Category: Featured Recipe

Thai Lettuce Cups with Vegan and Gluten-Free Options

Thai Lettuce Cups with Vegan and Gluten-Free Options

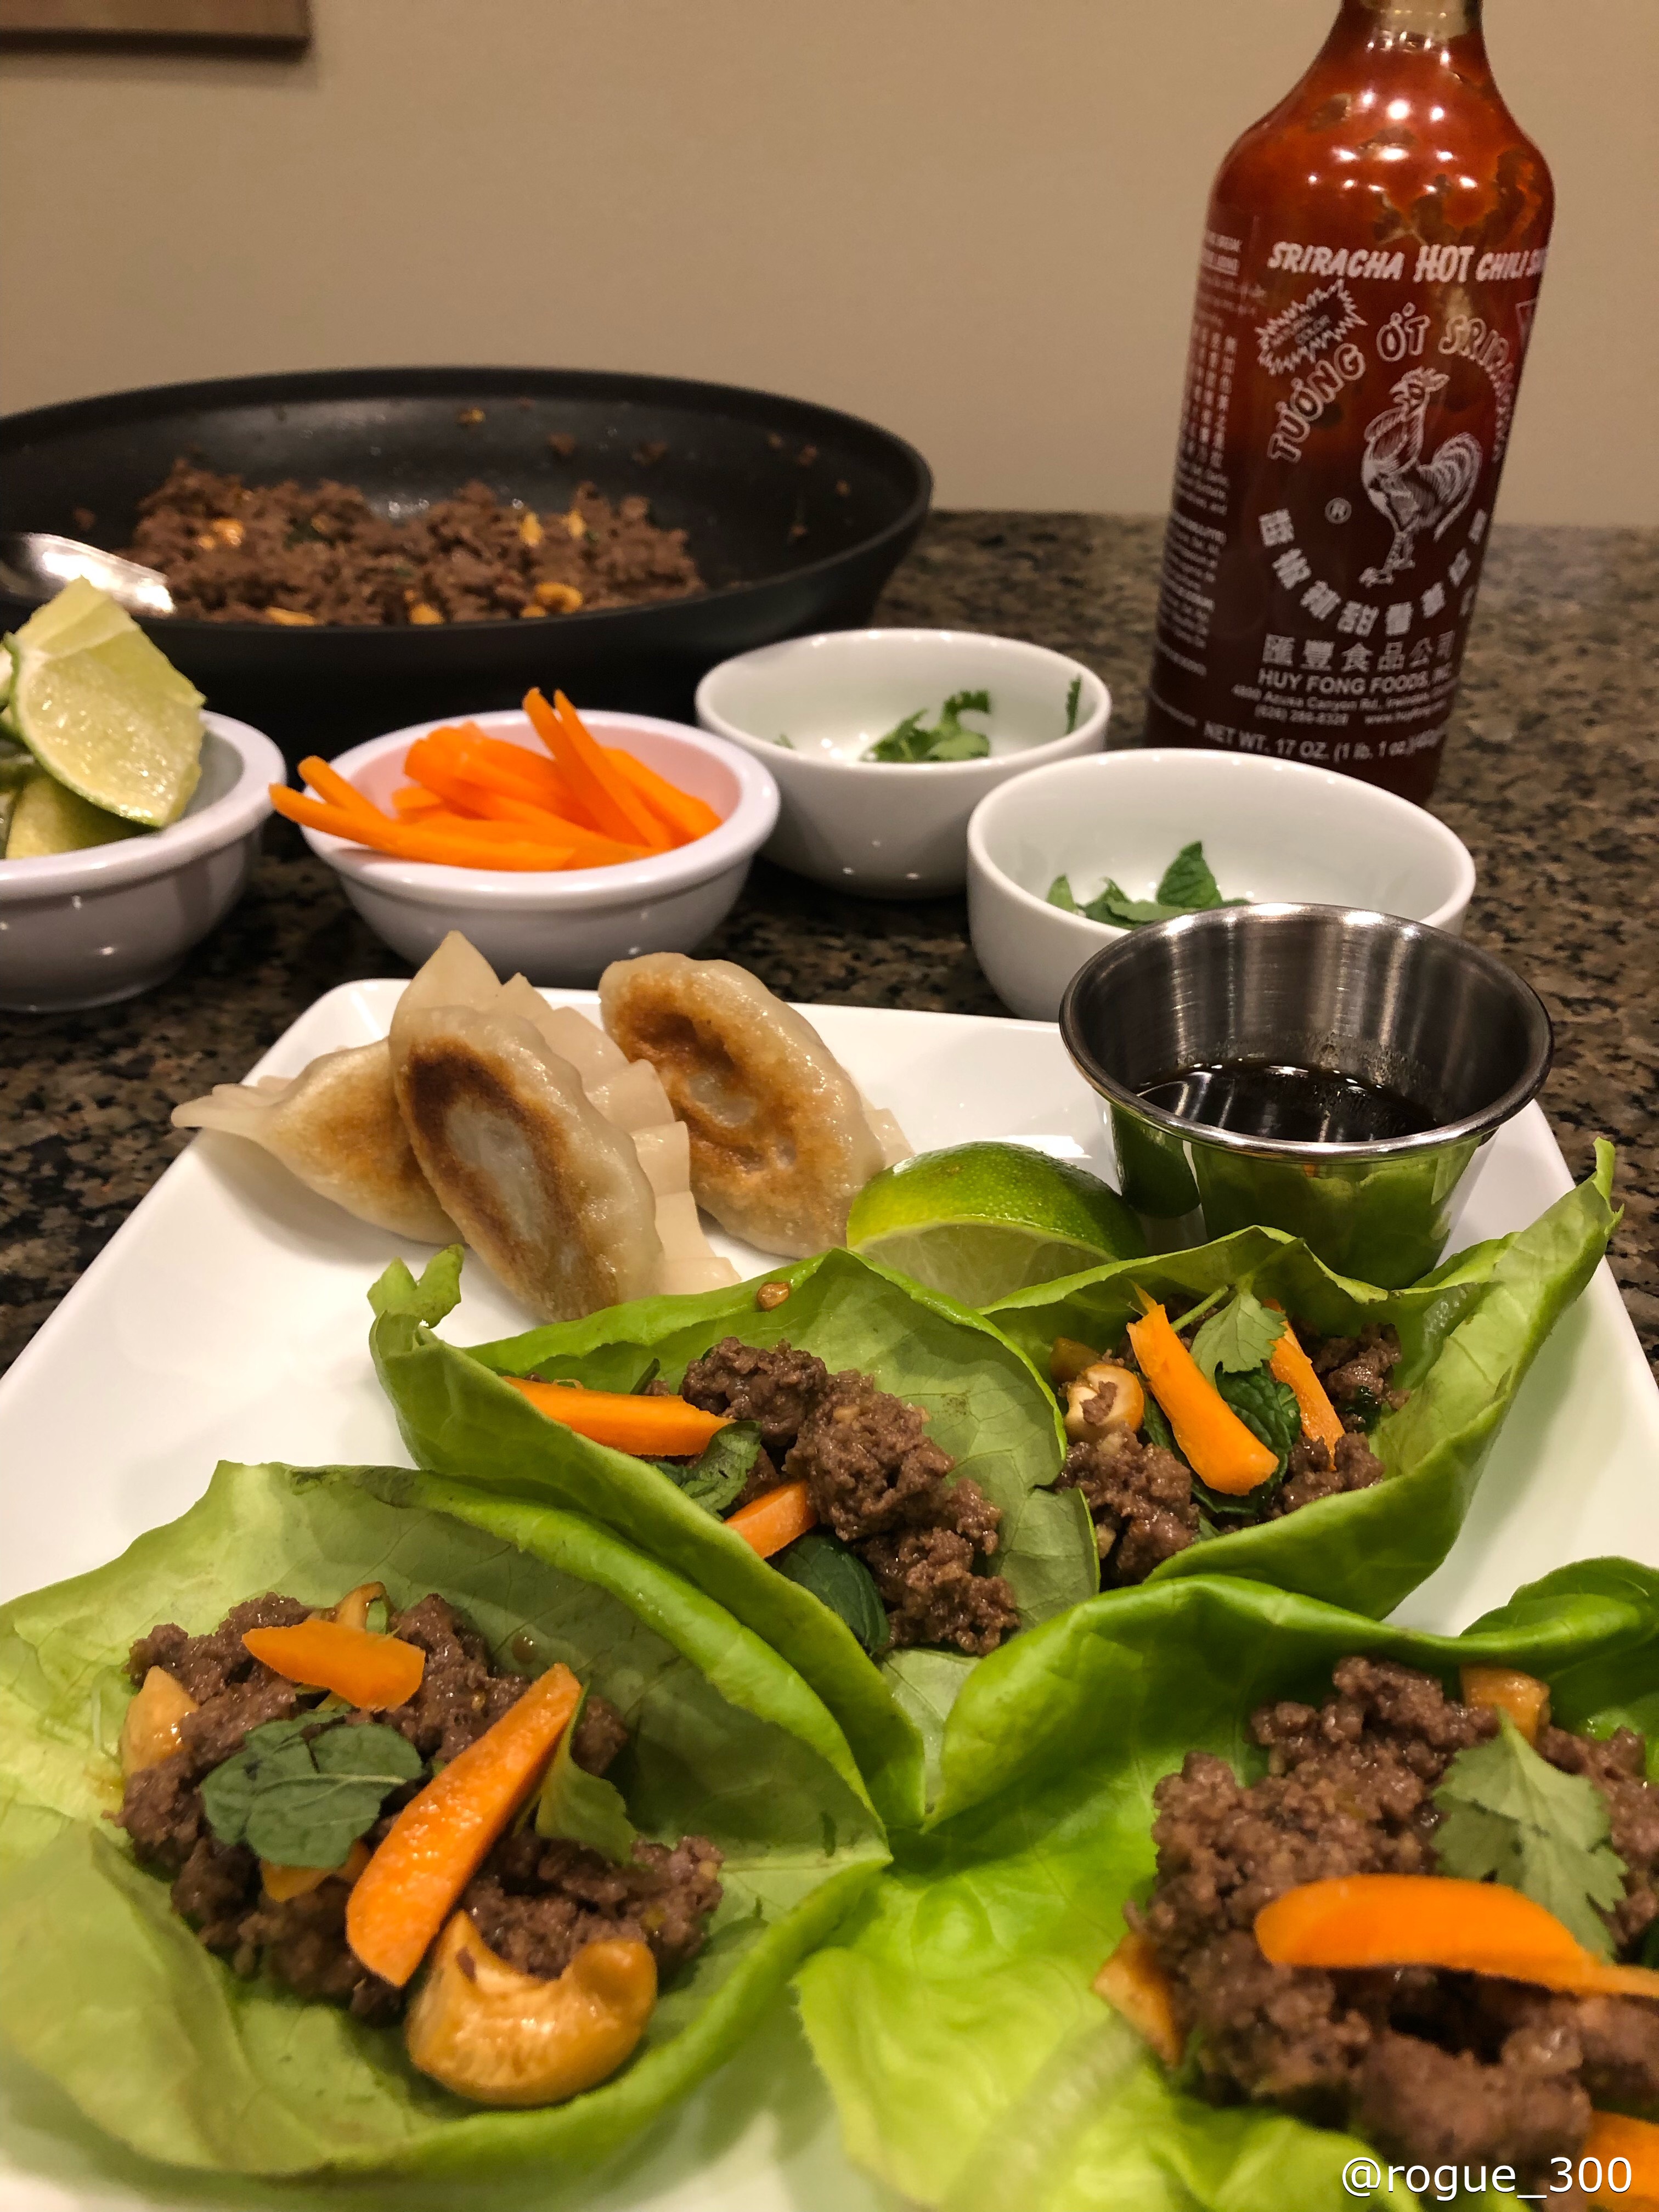
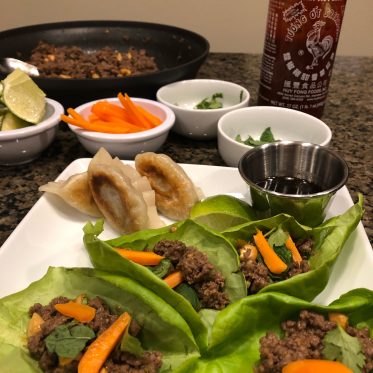
Winter is finally leaving! The transition from winter to spring always makes me happy, however this year, it’s making me downright ecstatic since it seemed as if it would never stop snowing or get warm. Join me in welcoming spring with these colorful, delicious, and easy to put together Thai Lettuce Cups. Pair these with pre-made dumplings for a complete dinner that’s on the table and ready to enjoy in under 30 minutes.

Ingredients
  

  • 1 head of butterhead lettuce
  • 1 1/2 TB canola oil
  • 1/4 cup chopped red onion
  • 1 TB finely chopped or minced ginger
  • 2 small or 1 large clove of garlic minced
  • 1 lb ground beef ground capon, plain ground pork, or finely chopped mushrooms
  • 1 TB soy sauce or tamari if gluten-free
  • 1 TB fish sauce or umami paste optional – if not using, add an additional 1/2 TB of soy sauce
  • 2 TB dark brown sugar
  • 1 tsp lime zest
  • 1 1/2 TB fresh squeezed lime juice
  • 1/4 tsp red pepper flakes
  • 1 scallion white and green parts, thinly sliced
  • 1/4 cup chopped fresh cilantro
  • 2 TB chopped fresh mint
  • 2 TB chopped cashews

Optional for serving:

  • Sriracha
  • Matchstick cut carrots
  • Lime wedges
  • Chopped cilantro
  • Dumplings

Instructions
 

  • Heat oil in a large skillet over medium heat. Add the onion and cook until soft, about 4 minutes. Add the garlic and ginger, cook 1 minute longer.
  • Increase heat to medium-high and add the ground meat or chopped mushrooms. Cook for 3 or 4 minutes, breaking apart the meat as it cooks. Add the soy sauce, fish sauce (or umami paste), brown sugar, lime zest, lime juice, and red pepper flakes. Continue cooking until meat is cooked through, or an additional 4 minutes if using mushrooms.
  • Off the heat, stir in the scallion, cilantro, mint, and nuts. Spoon into lettuce cups and serve with garnishes and dumplings for an easy weeknight, or any night dinner or lunch.

Notes

Leftover filling can be kept in the refrigerator for up to a week, or frozen for up to 3 months. Simply gently reheat on the stove top or in the microwave.

Old Fashioned Sorghum Caramels

Old Fashioned Sorghum Caramels

Preparation Time 15 min. Cook Time 25 min (or longer depending on your pot & the weather) Cooling: 3+ hours

Ingredients
  

  • 7 ounces 14 tablespoons unsalted WW Homestead butter (if you use a different butter, stick with something with a high butterfat & lower water content than commercial butter
  • 8 ounces 1 cup plus 2½ tablespoons, packed light brown sugar
  • ¾ cup Maasdam Mills sorghum syrup
  • 10 ounces 1¼ cups Hansen Dairy heavy cream
  • Special equipment: candy thermometer & heavy bottom pot preferably enamel on cast iron

Instructions
 

  • Line an 8″x8″ pan with parchment paper. Make sure the paper sticks out all around the edges. (This will help you lift the caramels out later.)
  • In a 5-quart heavy bottomed pot, melt the butter over medium-low heat.
  • Add the brown sugar, sorghum, and cream and stir together.
  • Bring this mixture to a boil cooking over medium-low heat, stirring frequently to prevent scorching.
  • Continue stirring scraping the sides with a silicone spatula to prevent crystals forming on the sides of the pot. Do not rush.
  • Cook until the mixture reaches 248 degrees (hard ball stage). Cooking further could make the candy too hard.
  • Pour the caramel into the prepared pan, and allow to cool in an undisturbed area for about 3 hours.
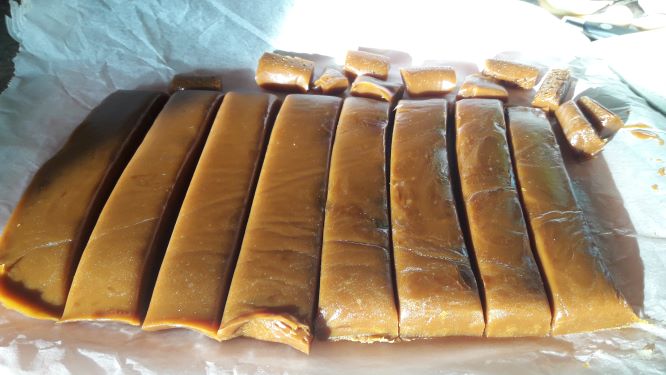
  • Once set and cooled to room temperature, lift the caramels out of the pan by lifting up the parchment paper edges.
  • Flip the caramels over on to a clean cutting surface & peel off the parchment paper.
  • Use a buttered knife to cut into bite size pieces & either wrap in parchment paper or dip in melted chocolate then place in mini cupcake liners for packaging.

Notes

These should keep for several weeks in the refrigerator & months in the freezer.

3 Easy Take-Out Fake-Outs for Beef Stir-Fry, Chicken Fried Rice and Chicken Quesadillas

3 Easy Take-Out Fake-Outs for Beef Stir-Fry, Chicken Fried Rice and Chicken Quesadillas

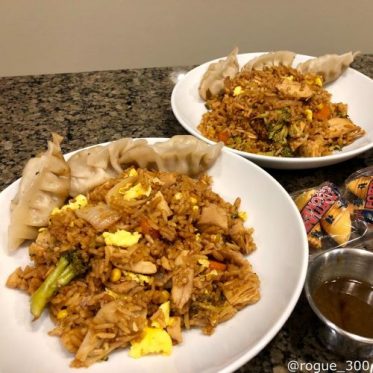
Life gets, well, busy. It seems as if we’re often running from one thing to another – work, errands, events – and it takes a toll, usually on the amount of time we have left to cook. Hey, I get it, and so do all the drive-thru places, take-out restaurants, and meal kit delivery services. Sometimes we want something quick and easy. Well, here are 2 super easy meals and one snack (who am I kidding, I totally eat quesadillas for dinner on a regular basis) that you can have on the table in about the time it takes to get take-out and drive home. How? By cooking a chicken ahead of time (I frequently have cooked chicken in the fridge for quick dishes) and using some pre-made items from our wonderful producer, Des Fresh! Now who wants beef stir-fry with veggies, chicken fried rice, and chicken quesadillas? Yeah, me too! NOTE: for vegetarian dishes, you can absolutely substitute sliced mushrooms or tofu in place of the meat.
5 from 2 votes

Ingredients
  

For the beef stir-fry:

  • 1 to 1 1/2 lbs flat steak think flank, skirt, or iron
  • 1/2 cup low sodium soy or tamari sauce note: tamari is gluten-free
  • 3 TB sherry
  • 2 TB light brown sugar
  • 2 TB cornstarch
  • 1 TB minced fresh ginger
  • 3 – 4 cups chopped vegetables snow peas, carrots, celery, broccoli, mushrooms, onions – whatever you have on hand and like
  • 3 TB cooking oil
  • Precooked dumplings and fried rice use half for this and the other half for fried rice – yay, two meals! from Des Fresh

For the chicken fried rice:

  • 1/2 container of vegetable fried rice from Des Fresh
  • 1 cup of precooked chicken
  • 1 egg
  • 3 – 4 TB soy or tamari sauce

For the chicken quesadillas:

  • 3 TB cooking oil
  • 1 cup chopped onion – red or yellow
  • 4 garlic cloves minced
  • 3 – 6 minced chipotle peppers in adobo sauce use more or less dending on your spice preference
  • 4 ripe tomatoes seeded and diced
  • 3 scallions thinly sliced (optional)
  • 2 TB honey
  • 2 1/2 cups cooked chicken shredded or diced
  • 1 tsp salt
  • 1/2 cup cilantro chopped
  • 6 or 7 8″ flour tortillas
  • 4 cups 2 8 oz. blocks shredded cheddar and/or jack cheese
  • sour cream & salsa for serving

Instructions
 

For the beef stir-fry:

  • In a medium bowl, mix together soy sauce, sherry, brown sugar, cornstarch, and ginger. Set aside half of the liquid, add the sliced beef to the bowl and toss to coat well.
  • Heat oil in a large skillet or wok over medium-high heat. Add the vegetables in batches – heavier, courser vegetables such as carrots, peppers, and celery should be added first, followed by mushrooms – broccoli and snow peas should be added last to prevent overcooking. Stir the vegetables frequently and cook until tender-crisp. Remove to a clean plate or bowl.
  • Allow the pan to get hot again, then add the beef in small batches, being careful to leave most of the marinade in the bowl. Allow the meat to cook for a minute or two before stirring. Turn or stir, to cook both sides – about 2 1/2 to 3 minutes total time. Remove to a separate bowl and repeat with remaing beef.
  • When the last batch of beef has been added to the skillet, return the cooked beef to the pan, followed by the vegetables. Pour the reserved marinade over everything and allow to cook, stirring constantly for about 30 seconds.
  • Serve immediately with fried rice and dumplings for a complete Asian-style dinner.

For the chicken fried rice:

  • In a large skillet sprayed with cooking spray or misted with oil, scramble the egg over medium-low heat & then remove to small dish to be used later.
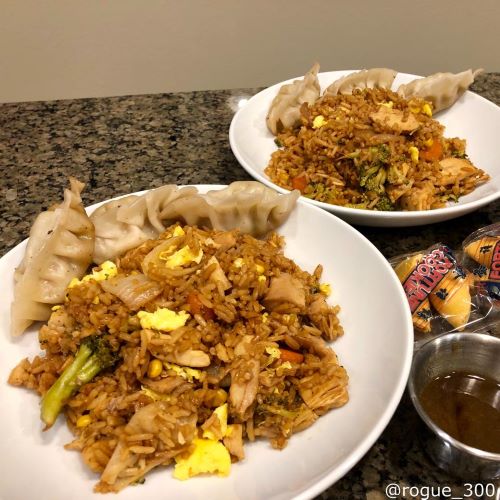
  • To the same skillet, add the precooked fried rice, chicken, and 2 TB soy sauce. Gently warm the rice, stirring frequently and adding additional soy sauce if needed. Once the rice and chicken are completely warmed, about 10 minutes, gently stir in the scrambled egg.
  • Serve with dumplings for a complete Chinese take-out style dinner.

For the chicken quesadillas:

  • In a large skillet, heat the olive oil over medium heat. Add the onion and saute until soft – about 5 minutes. Add the garlic and cook for another minute. Stir in the chipotles, adobo, and tomatoes. Cook until the liquid from the tomatoes has evaporated and the mixture has thickened – about 15 to 20 minutes. Stir in the honey, chicken, scallions (if using), salt, and cilantro. Keep warm while you prep to tortillas.
  • Heat a second skillet or griddle over medium heat, spray lightly with nonstick cooking spray. Lay a tortilla in the pan, and heat until hot to the touch, but not crisp. Flip the tortilla over, then sprinkle with shredded cheese. Once the cheese is mostly melted, spoon the chicken mixture on half of the tortilla and fold over. Continue cooking until the tortilla is crisp, and then flip over to crisp the other side. Remove from the heat and allow to rest for 2 or 3 minutes before cutting into wedges.

Notes

Serve with sour cream and salsa

Corned Beef and Cabbage

Corned Beef and Cabbage

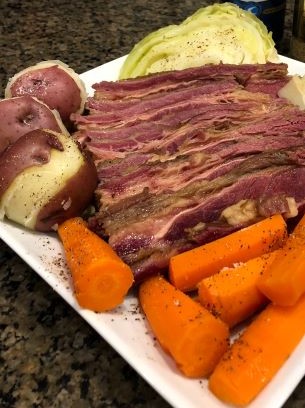
Corned beef and cabbage – ah, the quintessential Saint Patrick’s day fare! With this easy recipe, there’s no need to shy away from making this staple at home. The brine does all the heavy lifting, and since it can cure in as little as 2 days (though 4 is much better) it doesn’t require too much advanced planning. So pull up a stool, breakout the shamrock’s and enjoy this dish at home.

Ingredients
  

  • 1 flat cut beef brisket 2 – 5 lbs
  • 3/4 cup table kosher, or pickling salt
  • 1/2 cup packed brown sugar
  • 2 tsp pink curing salt #1
  • 6 peeled garlic cloves divided
  • 6 bay leaves divided
  • 5 allspice berries
  • 2 TB peppercorns divided
  • 1 TB coriander seeds
  • 1 12 oz bottle of stout beer
  • 6 carrots peeled, halved crosswise, thick ends halved lengthwise
  • 1 1/2 pounds small red potatoes unpeeled
  • 1 head green cabbage uncored, cut into 8 wedges

Instructions
 

  • To cure the beef: Trim all but 1/8″ of fat from the outside of the brisket. Add 4 quarts of water to a large container (should be large enough to completely immerse the brisket). Add the curing salt, salt, and brown sugar – stir until everything is dissolved. Add 3 garlic cloves, 4 bay leaves, allspice berries, 1 TB of peppercorns, and coriander seeds to brine. Add the brisket and weigh it down with a heavy plate. Cover and refrigerate for 2 to 6 days. The meat will turn gray on the outside, but will change to pink when it’s cooked.
  • Preheat oven to 275 degrees. Remove beef from the brine and rinse. Make a spice bundle by stacking 3 8″ squares of cheesecloth and placing 3 garlic cloves, 2 bay leaves, and 1 TB of peppercorns in the center. Tie the bundle securely with kitchen twine. Place the brisket, spice bundle, beer, and 1 1/2 cups of water in a heavy dutch oven. Over high heat, bring everything to a simmer; cover and transfer to the oven. Bake until a fork easily slides into the meat – about 2 1/2 hours to 3 hours.
  • Remove the brisket to heat safe, covered, baking dish, and add 1 cup of cooking liquid. Transfer to the oven to keep warm.
  • Add a steamer basket to the Dutch oven and place over high heat. Once the liquid is boiling, reduce heat to medium-low and add potatoes. Cook for 5 minutes, covered. Add the carrots and cook, covered for another 5 minutes. Add the cabbage wedges and cook for another 10 – 15 minutes, or until the cabbage is cooked through.
  • While the cabbage is cooking, slice the beef, across the grain in 1/4″ – 1/2″ pieces. Transfer to a serving platter and slightly moisten with cooking liquid. Transfer the cooked vegetables to the platter; season with salt and pepper to taste.

Notes

Serve with mustard or Irish soda bread for an authentic Saint Patrick’s Day meal.

Valentine’s Day Menu

Valentine’s Day Menu

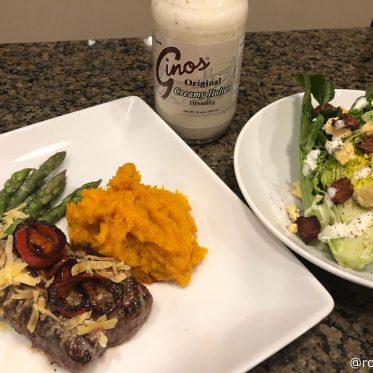
Whether for Valentine’s Day, an anniversary, a birthday, or any occasion, this is my go-to steak dinner that’s sure to impress. Instead of heading out to a restaurant, treat yourself and a special someone to a lovely dinner in because this steakhouse quality dinner at home won’t let you down.

Ingredients
  

  • 2 steaks beef tenderloin, NY strip, top sirloin, ribeye – whatever makes you happy
  • 1/4 cup shredded cheese such as Gouda Parmesan, or Lost Lake special reserve
  • 4 1/4 ” thick red bell pepper rings
  • 3 cups of 1/2″ cubed butternut squash
  • 2 TB honey or maple syrup
  • pinch of cayenne
  • 1 head of romaine lettuce
  • 1/4 cup blue cheese crumbles
  • 2 slices of bacon diced and fried
  • Creamy salad dressing such as creamy Italian
  • 1 TB + 1/2 tsp olive oil
  • 2 tsp ghee
  • Salt & Pepper

Instructions
 

  • Preheat oven to 450F. Toss the cubed squash in 1 TB of olive oil and spread out on a rimmed baking sheet. Season with salt & pepper. Roast until easily pierced with a fork – about 20 minutes.
  • While the squash is roasting, heat a heavy, oven safe skillet (I break out my cast iron for this) over medium high heat. Add the olive oil, and the pepper rings. Cook until slightly charred on each side about 2 minutes per side. Set aside. Pat the steaks dry with paper towels (this helps you to get a nice sear). Add the ghee to the skillet, once melted, add the steaks. Sprinkle with a liberal amount salt and little pepper to taste. Allow the steaks to sear without moving them for 2 to 3 minutes, flip and sear for another 1 minute. Transfer the skillet to the oven and cook to desired doneness – about 5 to 6 minutes for rare/medium-rare, 8 minutes for medium. Remove skillet from oven and sprinkle on shredded cheese. Return to oven and allow cheese to mostly melt – about 1 to 2 minutes. Remove from oven, twist pepper rings into a figure 8 and place 2 on each steak. Allow steak to rest for 5 to 10 minutes.
  • Using a fork, mash the cooked squash, stir in the honey or maple syrup and a pinch of cayenne (more or less depending on your preference). Set aside.
  • Trim the end off the romaine, leaving the connecting stalk intact, and cut the head in half from stalk to tip. Arrange each half on a place or in a shallow bowl. Divide the blue cheese and bacon between each wedge and drizzle with the dressing of your choice.
  • Pour a glass of wine, beer, or mix up your favorite cocktail. Serve the steaks with the mashed butternut squash and enjoy your incredibly easy steak dinner that rivals anything you can find in a steakhouse.

Notes

For an extra special treat, serve one of our amazing baked goods for dessert – this meal pairs perfectly with cheesecake or cream puffs.

Super Bowl Pork Nachos/Tacos

Super Bowl Pork Nachos/Tacos

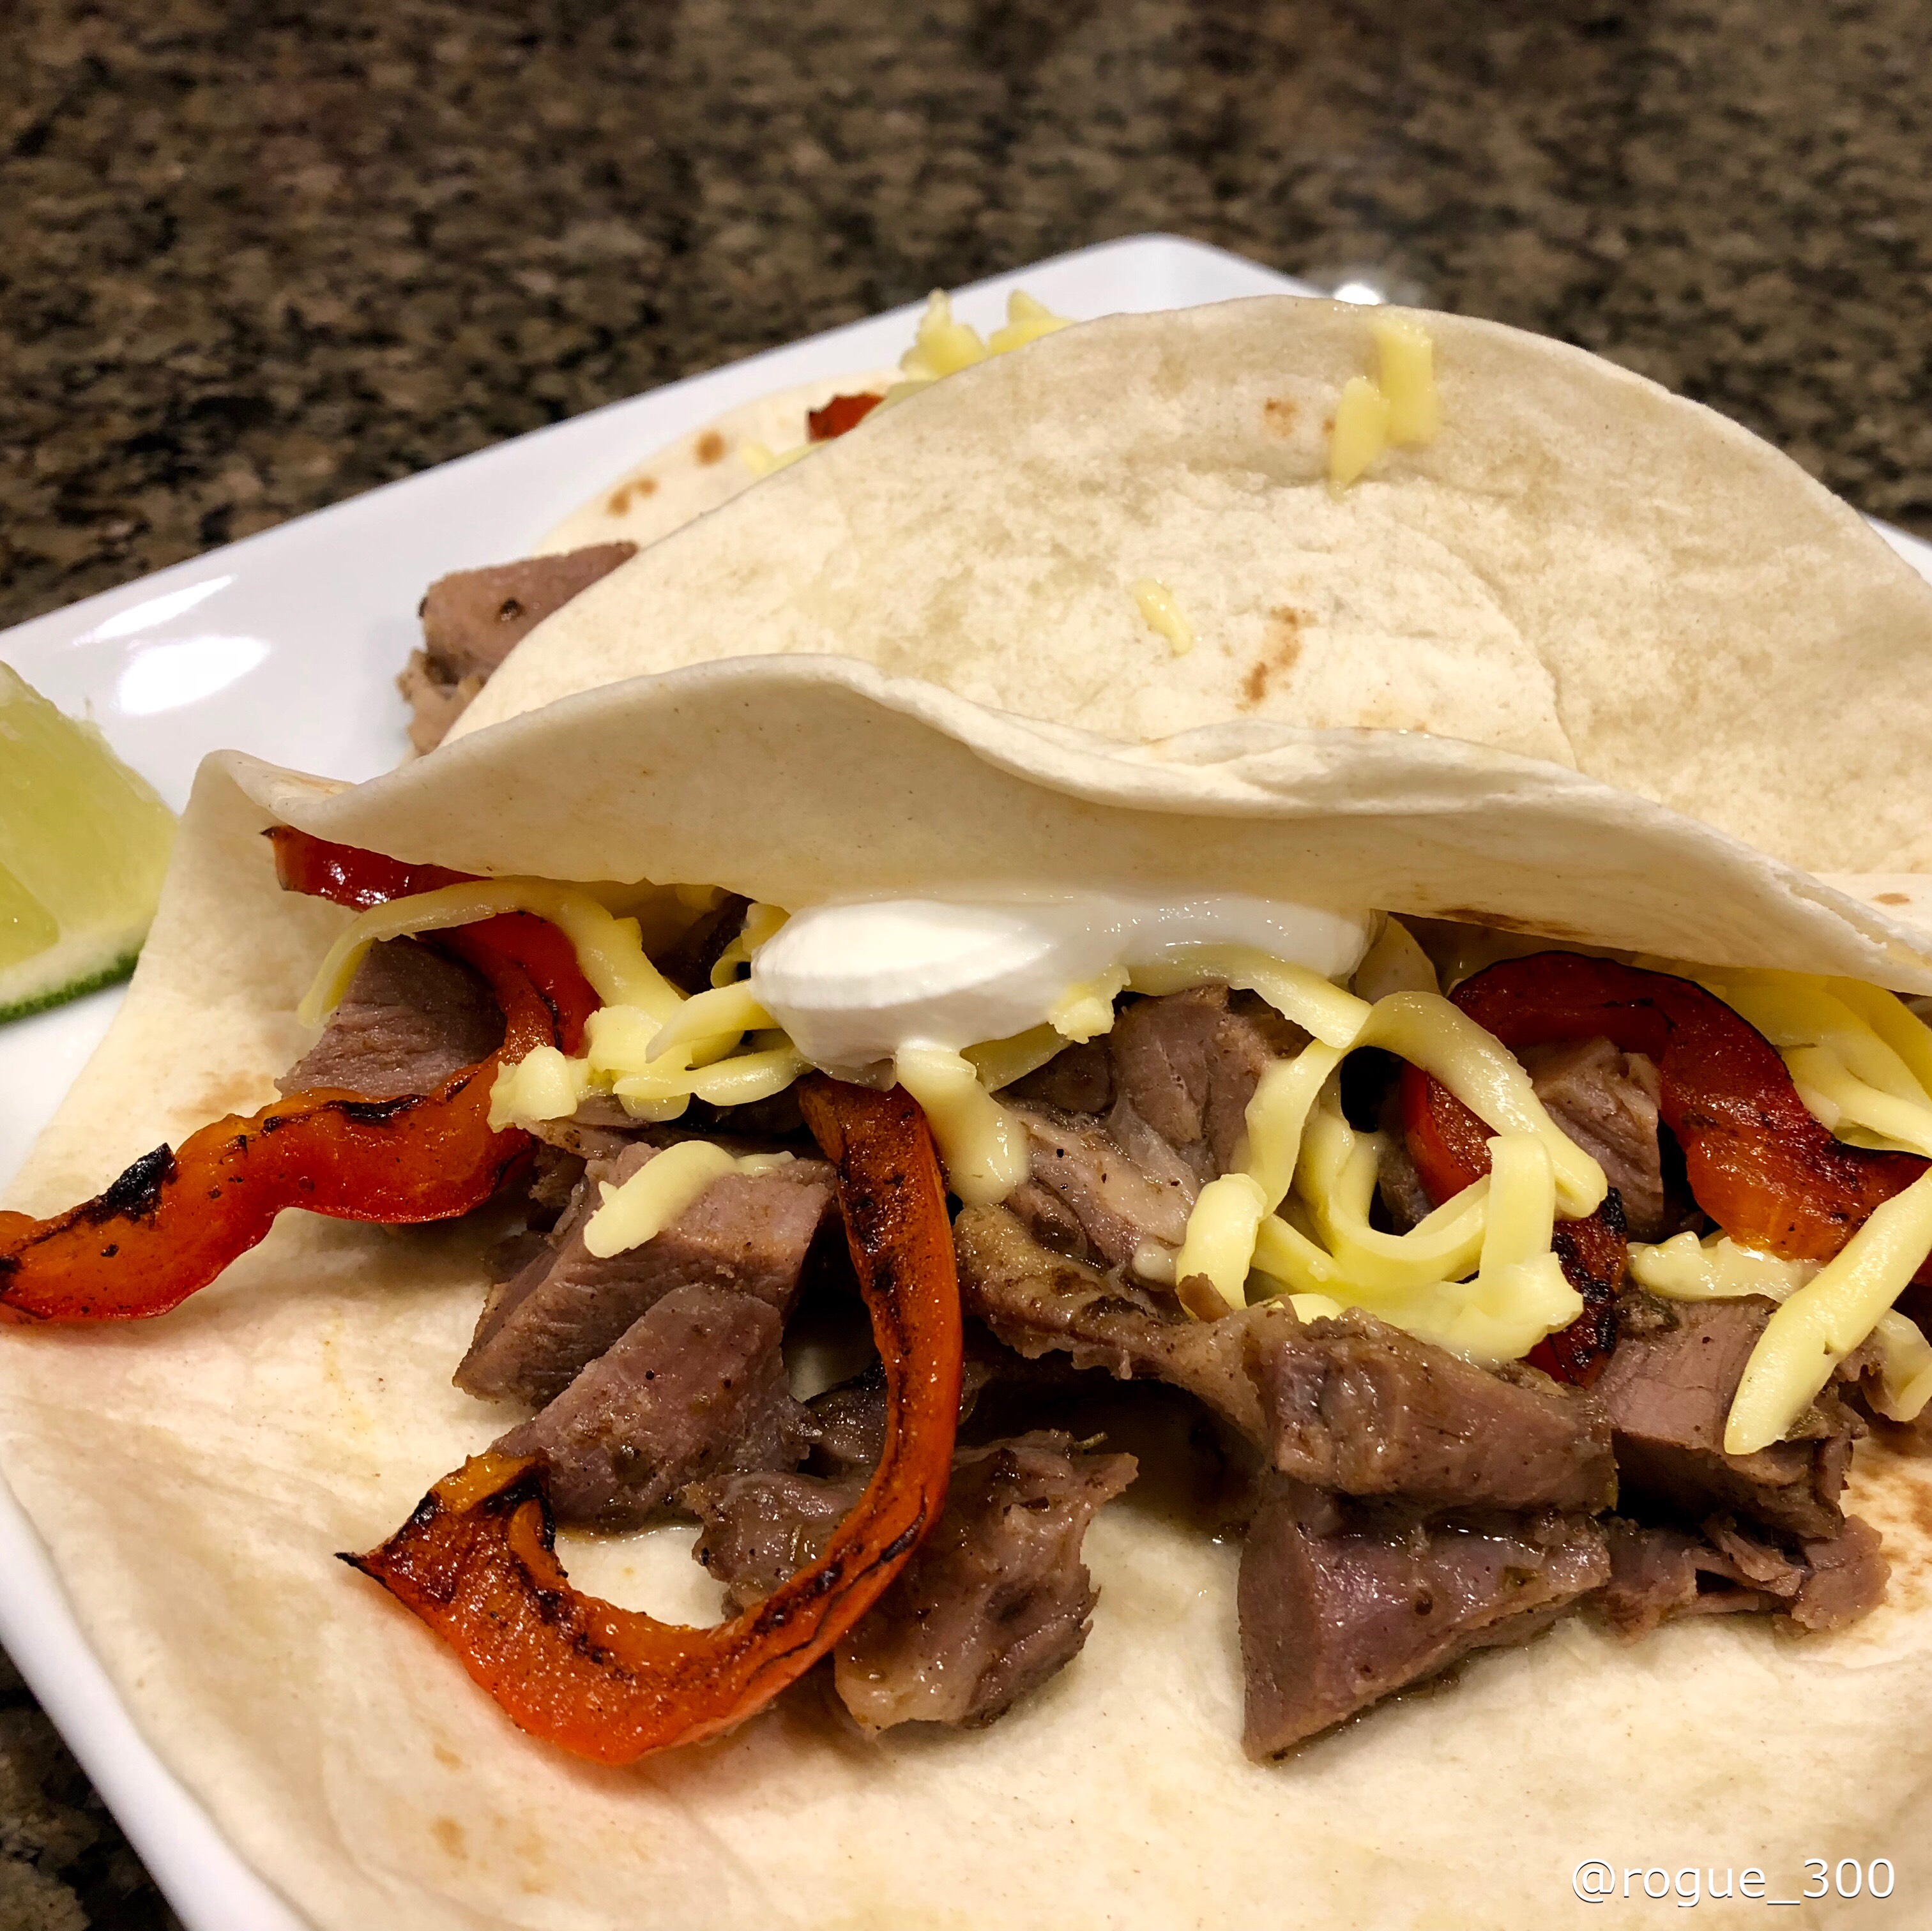
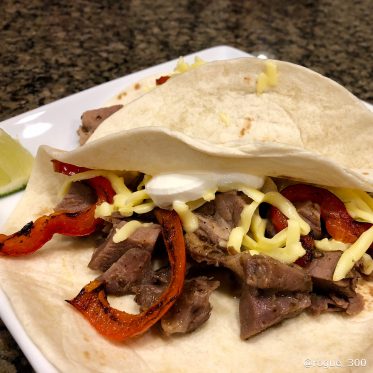
Who’s ready for some football? Whether you’re cheering for the NE Pats or the LA Rams, you and your friends will surely be cheering for these easy to make, great to eat nachos & tacos. Grab a few friends, your favorite beer, and get ready for kick-off because this recipe can easily be made the day before and warmed up in crock pot for the big game.

Ingredients
  

  • 4 to 6 pounds pork shoulder/Boston butt
  • 1 tsp dried oregano
  • 1 tsp ground cumin
  • 1 tsp chili powder
  • 1 TB salt
  • 1/2 tsp ground black pepper
  • 1/2 tsp garlic powder or 4 cloves garlic, minced
  • 1 TB olive oil
  • 2 TB white wine vinegar
  • 1/4 cup light brown sugar
  • 1 TB onion powder or 1 whole onion, finely minced

For serving: flour tortillas, butter lettuce, tortilla chips, charred bell pepper slices, lime wedges, sour cream, jack or cheddar cheese

Instructions
 

  • In a small bowl, combine oregano, cumin, chili powder, salt, pepper, garlic, olive oil, white wine vinegar, brown sugar, and onion. Mix well – if you’re using garlic cloves or a whole onion, puree everything in a blender. Pour mixture over meat, coating all sides.
  • Either preheat oven to 300 degrees, place coated meat in a Dutch oven, and pour 2 cups of water into the pot. Cover and roast for 5 hours, or until meat is fork tender. Alternatively, place meat in a crock pot with 1/2 cup of water, and cook on low for 8 to 10 hours. This can also be made in an Instant Pot, by using 1 cup of water and cooking on high pressure for 75 minutes, with a natural pressure release.
  • Remove the meat, shred or cube, and then return to the liquid to prevent drying out.

Notes

Serve as pork tacos, over nachos, a mixed salad, or in lettuce cups with your favorite toppings. Squeezing a bit of lime over it before serving, gives it a nice, fresh, pop of flavor.
Biscuits + Gravy


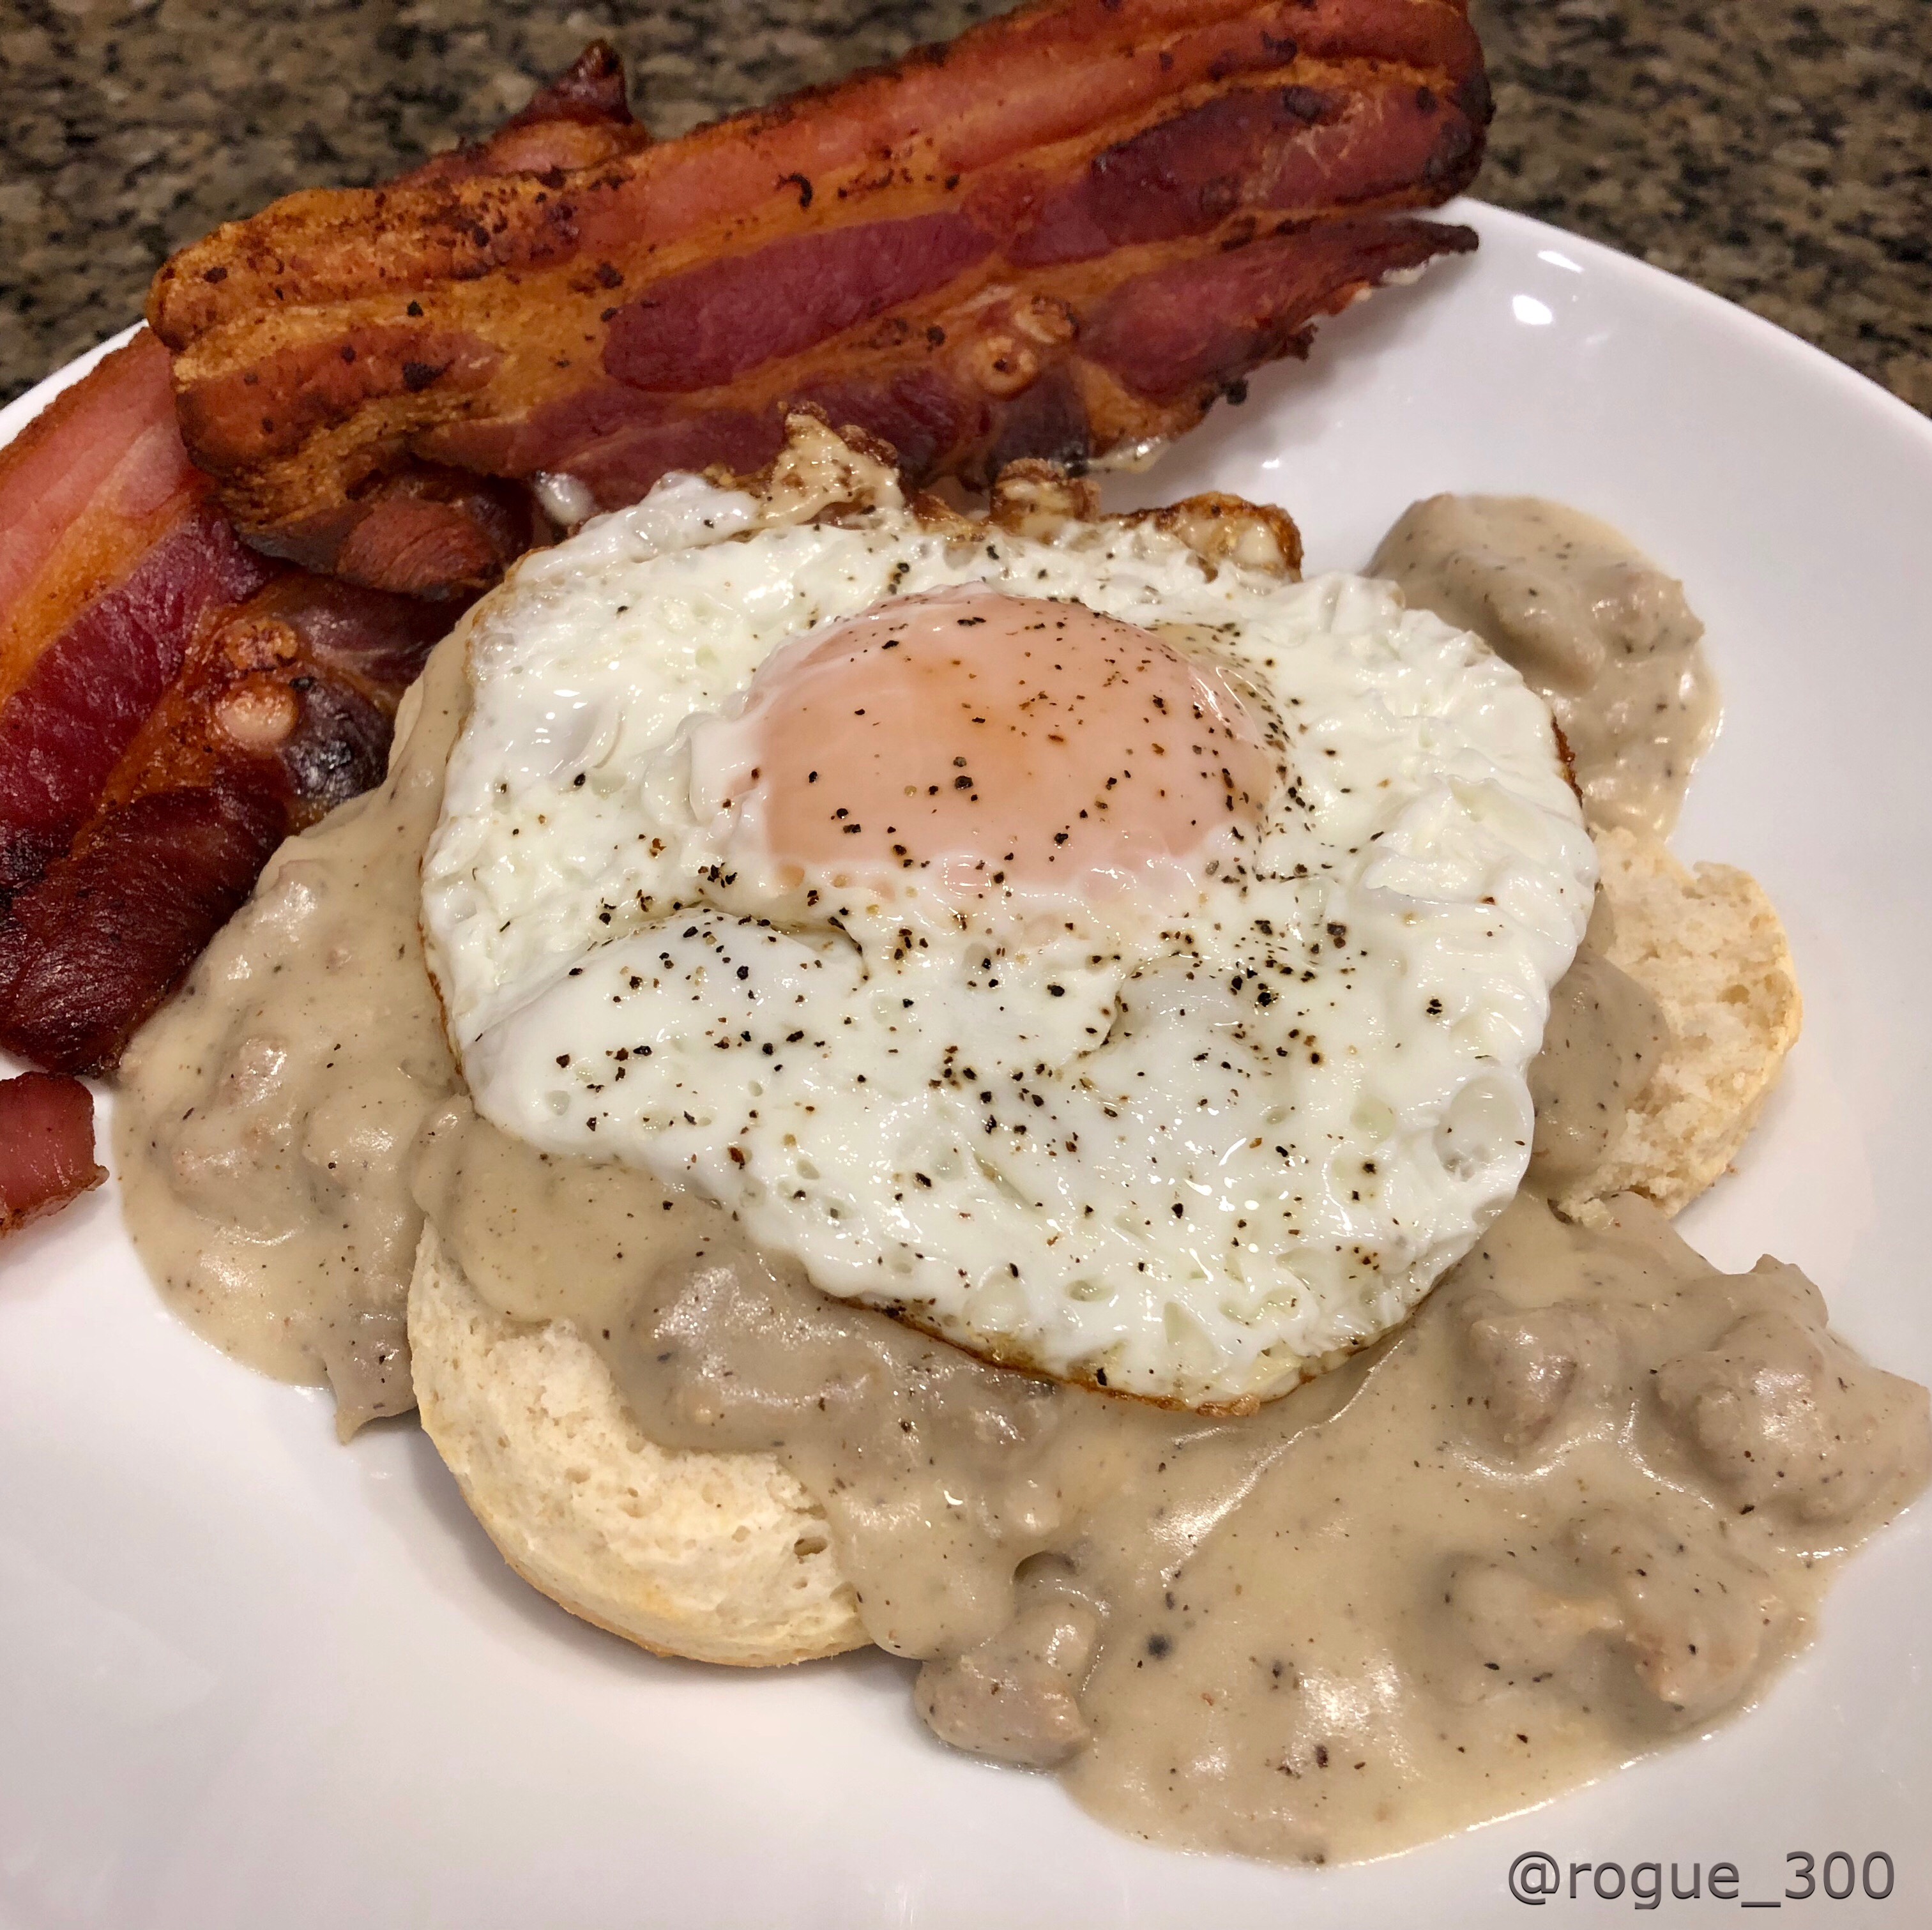
You don’t need to live on a farm to enjoy a farmhouse breakfast. This sausage gravy is perfect for a weekend brunch, a weeknight breakfast-for-dinner, or make a batch over the weekend, and then reheat it for a quick breakfast during the week by simply adding a splash of milk before reheating.

Ingredients
  

  • 1 lb seasoned breakfast sausage pork or chicken sausage
  • 1/3 cup all-purpose flour
  • 4 cups whole milk
  • 1/2 tsp seasoned salt
  • 1 1/2 tsp ground black pepper
  • 1 to 2 TB cooking oil only if using chicken sausage
  • Biscuits eggs, and bacon for serving

Instructions
 

  • In a large skillet over medium-high heat, break apart the sausage and cook through. If using chicken sausage, add 1 TB of cooking oil.
  • Sprinkle in the flour and stir to coat the sausage. If you’re using chicken sausage, and it’s too dry, add a bit more oil and stir until the flour is thoroughly coating the meat. Allow to cook for about a minute.
  • Slowly stir in the milk, 1 cup at a time, stirring to combine after each addition. Stir in the seasoned salt and 1 1/2 tsp of black pepper.
  • Reduce heat to a simmer and allow to cook for 10 to 15 minutes, or until it reaches desired consistency. Taste for seasoning and add more if needed. If the gravy gets too thick, and in a bit of milk and stir.

Notes

Serve over warm biscuits with eggs and bacon for a complete farmhouse breakfast. Leftovers can be frozen for several months – simply thaw, add a splash of milk, and reheat.

Crispy Baked Capon Wings

Here’s a recipe from producer Holdeman Poultry.

Holdeman Poultry is family owned business. We started raising Capons in early 2012. These chickens are minimally processed with no fillers or additives added.For those of you that are not familiar with Capons here is little info. Capons are a very old tradition. Many old timers will remember raising these on the farm. A capon is raised quite large and is much more tender and juicey than your average chicken. Most people say this is the best chicken they have ever had.

Capon wings are on sale for just $2.20/lb for the holidays. Add them to your cart then try this recipe:

CRISPY BAKED WINGS

Ingredients
  

  • 3/4 cup flour
  • 1/4 tsp. cayenne pepper
  • 1/2 tsp. garlic powder
  • 3/4 tsp. salt
  • 1/4 tsp. paprika
  • Approximately 5 lbs. wings
  • 1/2 cup butter
  • 1/2 cup hot pepper sauce Louisiana
  • 1/4 tsp. garlic powder
  • 1/4 tsp. black pepper

Instructions
 

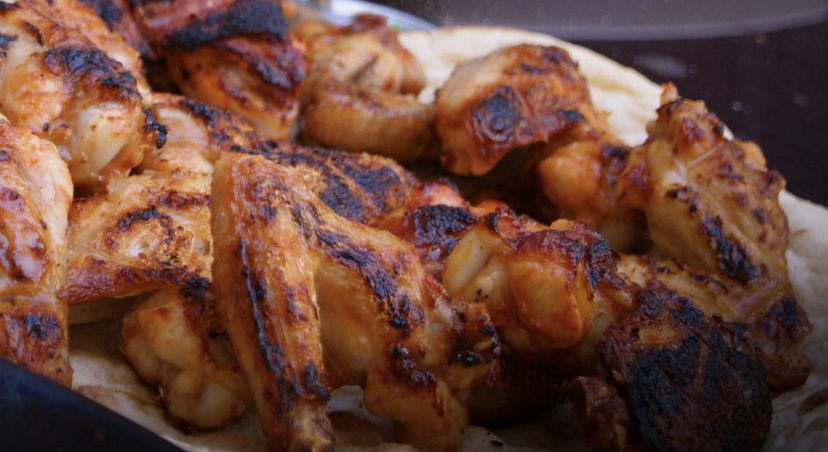
  • Line a cookie sheet with foil. Grease well. Mix first 5 ingredients well. Dredge wings in flour mixture, place on greased pan, then cover and refrigerate for at least 1 hour. Preheat oven to 425 degrees. Melt butter and mix in the hot pepper sauce, garlic powder, and black pepper. Dip wings in the sauce then place on prepared cookie sheet. Bake for 30 minutes, then turn wings and continue baking for another 30 minutes or until done. Wings should be crispy and delicious!


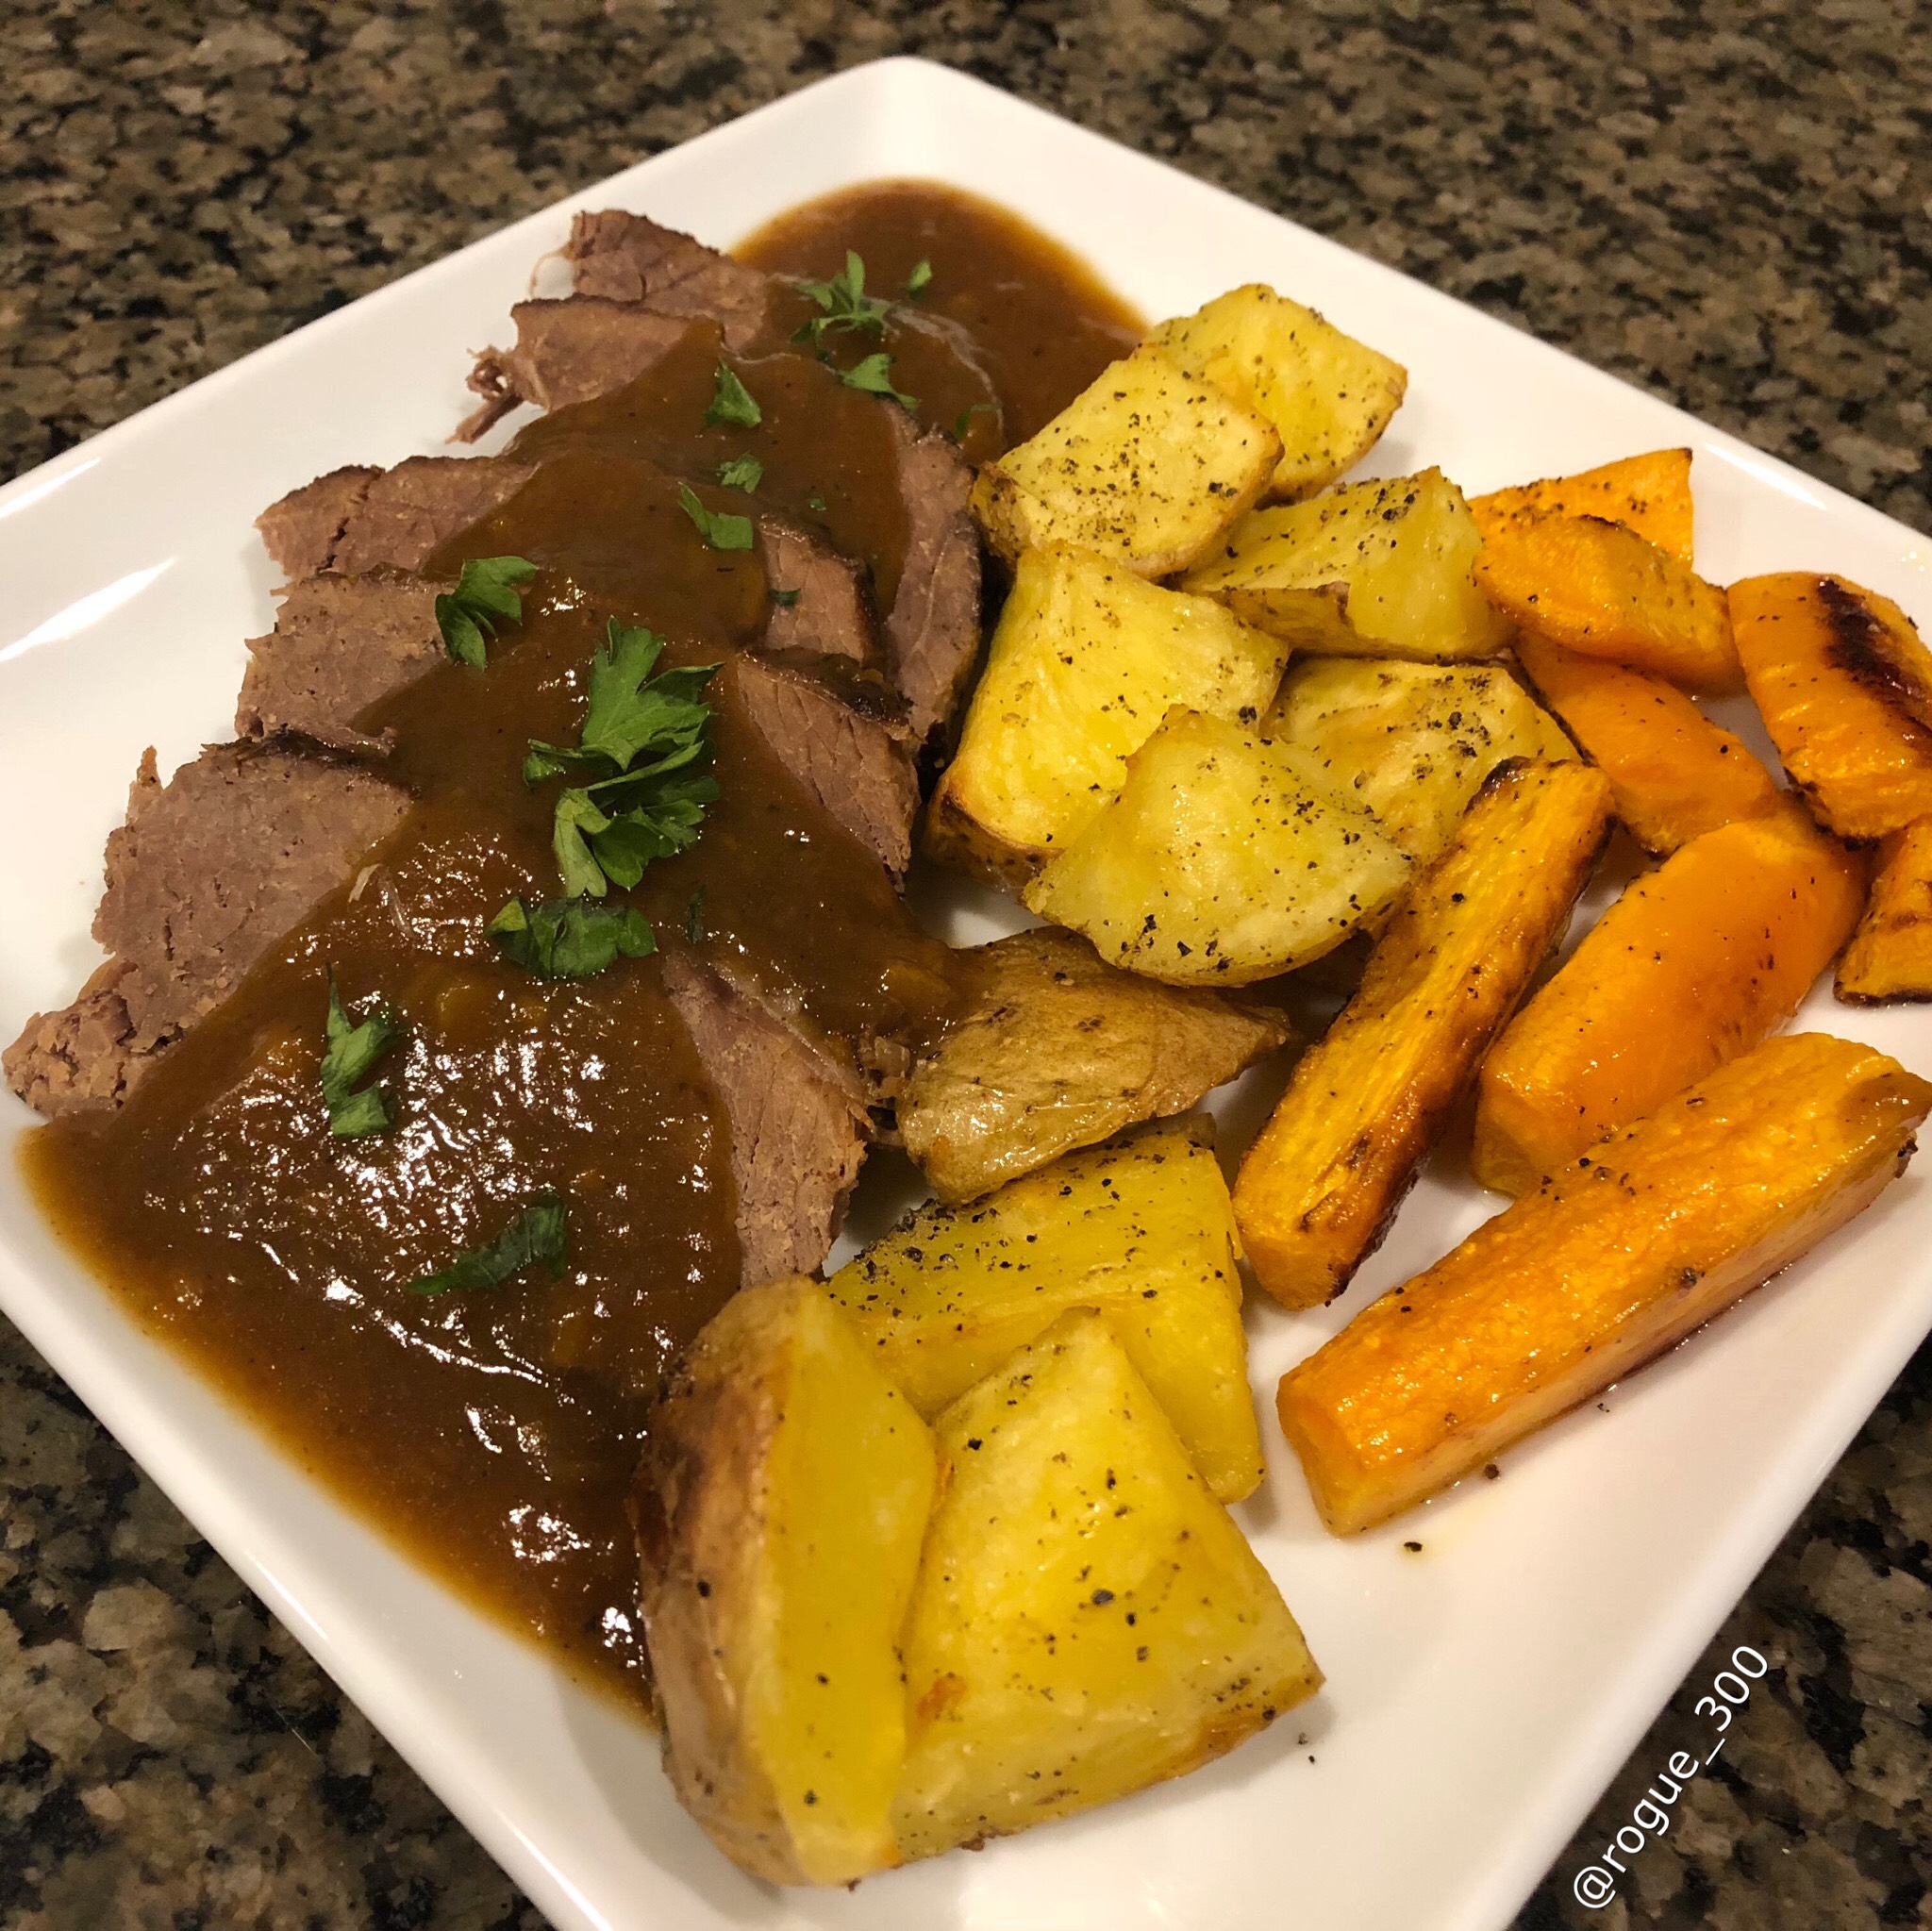
Recipe: Sunday Pot Roast (Company Optional)

Have you ever had gravy that’s so good that you want to eat it in a bowl with a spoon? This simple pot roast renders that kind of gravy – it’s rich, flavorful, and has a perfectly silky texture that stands up to anything you want to ladle it over. This roast is good enough for Sunday dinner with company and easy enough to make on a lazy afternoon with family.

Recipe: Sunday Pot Roast (Company Optional)

(Pictured with a round roast from Ebersole Cattle Company) Have you ever had gravy that's so good that you want to eat it in a bowl with a spoon? This simple pot roast renders that kind of gravy - it's rich, flavorful, and has a perfectly silky texture that stands up to anything you want to ladle it over. This roast is good enough for Sunday dinner with company and easy enough to make on a lazy afternoon with family.

Ingredients
  

  • 3 to 5 lb beef roast chuck, round, or rump
  • 4 TB ghee
  • 2 yellow onions peeled and halved
  • 8 carrots washed, unpeeled, cut in 1/2" circles
  • 1 cup red wine
  • 2-3 + 1/4 cups beef stock or broth
  • 4 sprigs of fresh rosemary or 1 TB dry
  • 4 springs of fresh thyme or 1 TB dry
  • Salt
  • Ground black pepper
  • Smoked paprika *can be found at Trader Joe's, Penzey's, or online
  • 2 TB corn starch

Instructions
 

  • Preheat oven to 275 degrees.
  • Generously sprinkle the roast with the salt, black pepper, and smoked paprika. Set aside.
  • In a heavy Dutch or French oven, melt the ghee over medium-high heat. Add the onions and carrots to the pot and cook until browned on both sides. Remove to a clean plate.
  • Place the roast in the pot and sear on each side for about 3 minutes - don't move it around so that you get a good, brown crust going. Remove to the plate with the vegetables.
  • Pour the wine into the pot and scrape the brown bits off the bottom as the wine boils.
  • Once the pot is deglazed, put the roast back in and place the vegetables on top. Pour in enough beef stock to come at least halfway up the roast. Place the herbs on top.
  • Put the lid on the pot and move to the preheated oven. Roast for 3 1/2 to 4 hours, or until the meat is fork tender.
  • Remove the roast to a plate and keep warm. If using fresh herbs, remove the herb sprigs from the pot and discard. Using an immersion blender, or carefully transferring the cooked vegetables and liquids to a blender, blend until smooth. If the gravy is thinner than you would prefer, mix 2 TB corn starch with 1/4 cup beef stock and pour into the gravy while bringing to a boil over medium-high heat and cooking until desired consistency.

Notes

Slice the roast and serve topped with the pan gravy along side roasted or mashed potatoes, vegetables, and of course bread for sopping. Leftovers can be frozen by storing the beef and gravy separately - add a couple of TB of beef stock in with the meat to prevent it from drying out when reheated.


Winter Squash Gratin

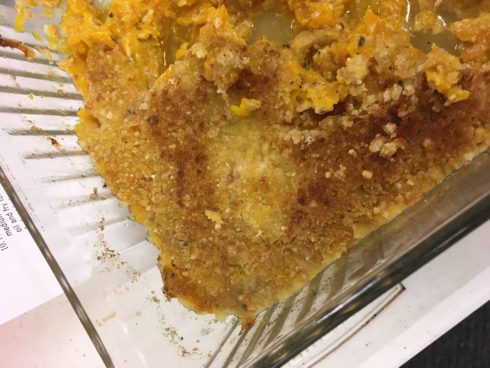
Member Chad’s winter squash gratin was a HUGE hit at our sampling event last Thursday. Grab the recipe here, then shop the ingredients.


Winter Squash Gratin
Author: Chad
Ingredients
  • roughly 3 Lb winter squash, peeled and seeded (Any firm, good flavored squash like butternut, Hubbard, Kuri will be perfect)
  • 6 fresh sage leaves, plus 3-5 leaves for garnish
  • 1/2 medium onion
  • 1 pint of heavy cream
  • 3/4 cup of grated parmesan cheese
  • 3/4 cup breadcrumbs
  • 1 tablespoon of butter, plus extra for greasing pan
  • 1/2 teaspoon salt
  • 1/4 teaspoon black pepper
  • Olive Oil for frying sage leaves.
Instructions
  1. Preheat oven to 400 degrees.
  2. Mix breadcrumbs and parmesan cheese in a bowl.
  3. Peel and dice onion finely. Place 1 tbsp butter and onion in a heavy bottomed pan over medium heat. Cook onions until very golden with a touch of brown, 15-20 minutes (reduce heat if onions begin to burn before caramelizing). Remove from heat.
  4. Slice 6 sage leaves finely. Add the sage and heavy cream to the pan with onions over very low heat for 10 minutes. Add the salt and the black pepper. Stir often and do not let the cream get to a boiling point. Remove from heat.
  5. Using a mandolin or a very sharp knife, slice the squash into very thin slices, about 1/8th of an inch thick.
  6. Taste the cream for seasoning and add more salt and pepper to taste if needed.
  7. Butter a 9 x 13 inch casserole dish on the bottom and sides.
  8. Create one even layer of butternut squash in the dish, spoon on and spread a thin coating of the cream on the squash and repeat the process until the the last layer is topped with cream. Sprinkle the breadcrumb mixture on top of the cream evenly.
  9. Cover with aluminum foil and bake for 35 minutes. Remove the foil and turn up the heat to a high broil until golden brown, roughly 5 minutes.
  10. Pour a liberal amount of olive oil in the bottom of a small skillet. Place over medium high heat. When oil begins to shimmer, place reserved sage leaves in oil and fry for 2-3 seconds (they will roll out flat on top of oil). Remove with a fork and place on paper towels.
  11. Let the squash sit for 10 minutes. Garnish with fried sage leaves and serve.