
Member Chad’s winter squash gratin was a HUGE hit at our sampling event last Thursday. Grab the recipe here, then shop the ingredients.
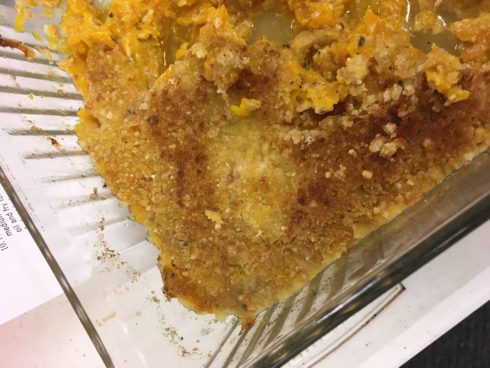
Winter Squash Gratin
Author:
Ingredients
- roughly 3 Lb winter squash, peeled and seeded (Any firm, good flavored squash like butternut, Hubbard, Kuri will be perfect)
- 6 fresh sage leaves, plus 3-5 leaves for garnish
- 1/2 medium onion
- 1 pint of heavy cream
- 3/4 cup of grated parmesan cheese
- 3/4 cup breadcrumbs
- 1 tablespoon of butter, plus extra for greasing pan
- 1/2 teaspoon salt
- 1/4 teaspoon black pepper
- Olive Oil for frying sage leaves.
Instructions
- Preheat oven to 400 degrees.
- Mix breadcrumbs and parmesan cheese in a bowl.
- Peel and dice onion finely. Place 1 tbsp butter and onion in a heavy bottomed pan over medium heat. Cook onions until very golden with a touch of brown, 15-20 minutes (reduce heat if onions begin to burn before caramelizing). Remove from heat.
- Slice 6 sage leaves finely. Add the sage and heavy cream to the pan with onions over very low heat for 10 minutes. Add the salt and the black pepper. Stir often and do not let the cream get to a boiling point. Remove from heat.
- Using a mandolin or a very sharp knife, slice the squash into very thin slices, about 1/8th of an inch thick.
- Taste the cream for seasoning and add more salt and pepper to taste if needed.
- Butter a 9 x 13 inch casserole dish on the bottom and sides.
- Create one even layer of butternut squash in the dish, spoon on and spread a thin coating of the cream on the squash and repeat the process until the the last layer is topped with cream. Sprinkle the breadcrumb mixture on top of the cream evenly.
- Cover with aluminum foil and bake for 35 minutes. Remove the foil and turn up the heat to a high broil until golden brown, roughly 5 minutes.
- Pour a liberal amount of olive oil in the bottom of a small skillet. Place over medium high heat. When oil begins to shimmer, place reserved sage leaves in oil and fry for 2-3 seconds (they will roll out flat on top of oil). Remove with a fork and place on paper towels.
- Let the squash sit for 10 minutes. Garnish with fried sage leaves and serve.